We’ve all been there. One minute you’re walking out of the nail salon with flawless dip nails feeling fresh as hell.
Then suddenly it’s 3 or 4 weeks later and your dip nails have become french tips, but your schedule (or, perhaps, a global pandemic) has got you wondering how to remove dip nails… at home.
Removing dip nails at home can be tricky, and many of us won’t even attempt it. But the good news is that dip nails differ a bit from gel and acrylic nails.
Unlike gel and acrylic nails, dip nail polish does not require a harsh primer containing methacrylic acid for adhesion.
So, in theory, dip nail polish is less damaging to your natural nails and your body.
Because no harsh adhesives are used to apply dip nail polish, and thus no scraping is required to remove said adhesive, removing dip nails is actually less damaging than other long-lasting color options. (Hooray!)
Like many of you, I had a fresh dip mani just before everything shut down.
So, once I finally succumbed to the reality that I would indeed have to handle this sitch myself, I consulted a few nail experts for the best way for us to safely remove the dip powder and move toward healing our natural nails.
Turns out this mandated break from bi-monthly manicures might just end up being the best thing that ever happened to you.
Ok, maybe not. But at least your nails will be healthier.
How to Remove Dip Nails At Home
Step 1: Gather the Required Tools
Before you start, get set up with everything you need, find a comfortable spot, and queue up your current fave on Netflix (you do not want to rush this process).
You will need the following tools:
- Acetone
- Cotton Balls
- Tinfoil
- Nail File
- Nail Strengthener
- Cuticle Oil
Step 2: File the Topcoat
This might be the most important step of all.
Using a fine emery board, file the top of the nail in a back and forth, side to side motion. Do not file all the way down to the nail, just the topcoat.
The polish should appear dull and there will be a fine powder on your hand. Once this has occurred you have successfully removed the top layer of polish, thus allowing the acetone to penetrate.
Step 3: Wrap and Soak Nails
Unlike traditional nail polish, dip nail polish will not come off with a simple swipe or two.
Unfortunately, Acetone soaking really is a must with dip nails. (But, there are a couple of great Acetone options that include nourishing vitamin E and other oils like this favorite from Onyx Professional)
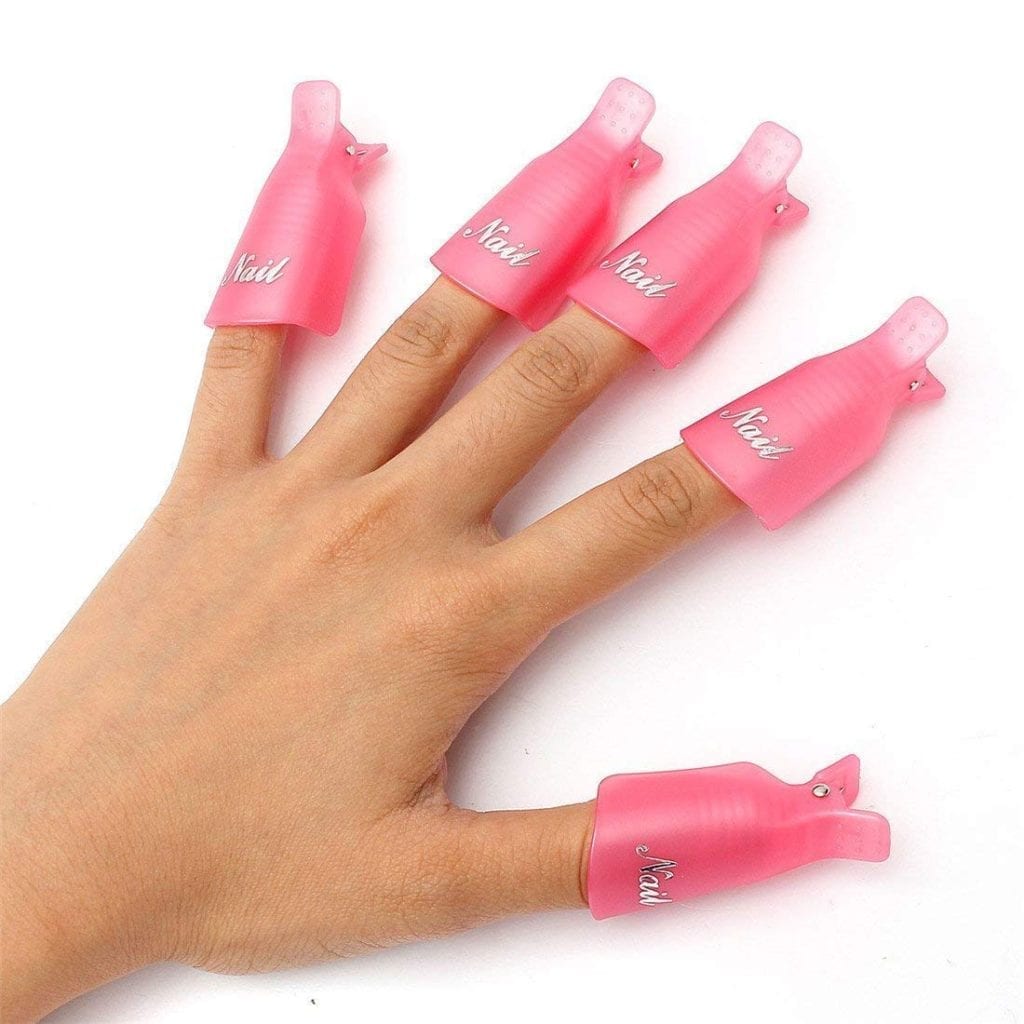
Drench a cotton ball with Acetone and place it on top of the nail, then wrap the nail in foil to hold the cotton tightly in place. (You may also use nail clips, like these)
Repeat for each nail. Allow nails to soak for at least 15 minutes, or until the polish may be easily removed with a swipe of the cotton ball.
If you have stubborn spots of polish, soak again for 5 additional minutes.
Step 4: Touch Up
If there are any traces of dip polish left behind after you soak them, simply wipe the nails with a cotton ball to remove all excess polish.
Trim and shape nails as desired.
Step 5: Post-Manicure Care
If you’re anything like me, your natural tendency would be to run straight back to the salon for your next mani sesh (queue Insta post).
Let’s be real, if you’re anything like me you wouldn’t be removing your dip nails yourself, to begin with…
However, a break from your regular manicure sessions might actually be a good thing. Giving your nails a little breather now and then is good for them (and your wallet).
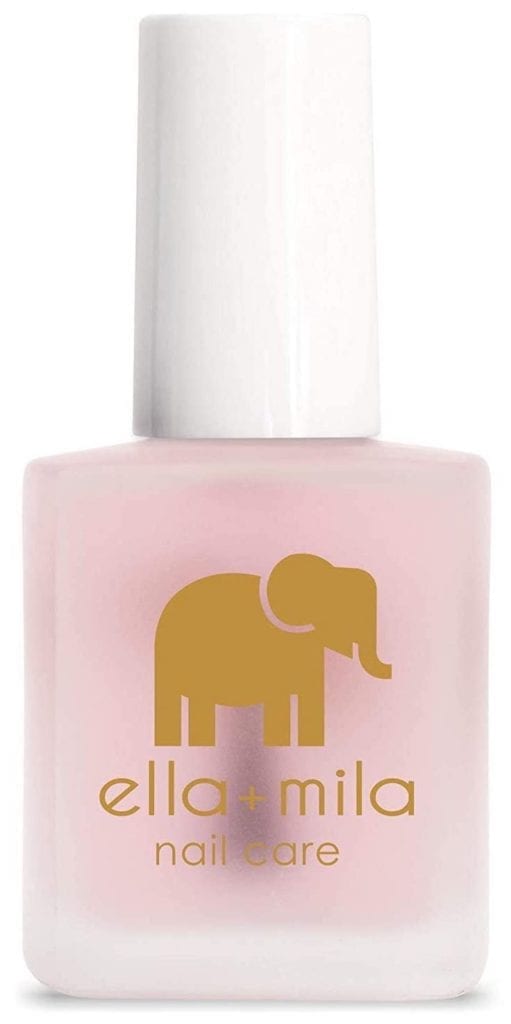
Use this time to strengthen your natural nails with a nail strengthener like my fave from Ella+Mila.
It’s also a good idea to give those cuticles some love with cuticle oil.
There are several great options out there, but check out my lesser-known recommendation below. (hint: you may already have it in your skincare collection)
A Few Suggestions:

Shop Now
A great nail strengthener is critical to repairing your nails after several dip powder manicures in a row. There is no better nail strengthener on the market than Ella+Mila’s First Aid Kiss. When used for a 28-day period, it will noticeably strengthen and rejuvenate your nails. Ella+Mila polishes are also 100% vegan, never tested on innocent animals, approved by PETA, made in the USA, and most importantly “7-Free.” I use this for regular maintenance as well, especially during dry months of the year.

Shop Now
This strengthener and base coat combo from JINsoon is another great option. And best of all? It is considered 5-Free: aka no harsh chemicals like formaldehyde, toluene, DBP, formaldehyde resin, or camphor here. It is best used as a base coat, but may be worn on its own too.

Shop Now
I’m gonna let you in on a little known secret. We all know that cuticle oil is great for our nails, hands, and well, cuticles. But did you know that CBD Oil is an amazing multitasker that nails it as a cuticle oil? (see what I did there) Leef Organics is the only CBD brand I trust and their Wild Crafted CBD Oil is the absolute best around. It completely healed my dry, cracked cuticles in only 10 days of regular use. Not to mention, you can use this as a face oil and hair oil as well! Highly recommend.

Shop Now
Using cuticle oil regularly is an absolute must to get your nails healthy again. If CBD is not your jam, try this option from No Lift Nails. It is a great product because it can be used with natural nails or with any long-lasting color option and won’t cause lifting. It is rich and moisturizing and has long-lasting effects. I like to use this when my cuticles are feeling extra dry.

Shop Now
Nail Clips are a great alternative to foil. Simply place the drenched cotton ball on the nail and clip it in place. Use them again and again. Easier to use than foil, and better for the environment. A win-win!

Shop Now
Acetone is key for dip powder removal, sorry, but that doesn’t mean it has to be harsh. This one from Onyx Professional is a great option that includes vitamins to help nourish the surrounding skin during soaking. I find it to be less abrasive than other acetones on the market, and it has a lighter scent.
Now that you’ve mastered how to remove dip nails at home, let’s talk Self Tanning and the best way to get your glow on at home.


